Difference between revisions of "User:AlexBot2004/Debug"
AlexBot2004 (talk | contribs) (Creating draft) |
AlexBot2004 (talk | contribs) |
||
| Line 1: | Line 1: | ||
| − | == | + | ==Limited debug mode== |
A limited, read-only debug mode can be toggled by inputting the following buttons on Controller 2: | A limited, read-only debug mode can be toggled by inputting the following buttons on Controller 2: | ||
*L+R, then Z | *L+R, then Z | ||
| Line 19: | Line 19: | ||
===Features=== | ===Features=== | ||
*A translucent red arrow appears in front of the player and points to floating [[balloon]]s and [[Special character|special visitors]]. | *A translucent red arrow appears in front of the player and points to floating [[balloon]]s and [[Special character|special visitors]]. | ||
| − | *The following build information is displayed on the title screen: | + | *The following build information is displayed on the title screen and during a [[K.K. Slider]] performance: |
| − | + | <pre>[CopyDate: 02/08/01 00:16:48 ] | |
| − | + | [Date: 02-07-31 12:52:00] | |
| − | + | [Creator:SRD@SRD036J]</pre> | |
====Debug controls==== | ====Debug controls==== | ||
| Line 28: | Line 28: | ||
{| class="styled color-gameplay mw-collapsible mw-collapsed" | {| class="styled color-gameplay mw-collapsible mw-collapsed" | ||
|- | |- | ||
| − | ! | + | ! Input |
! Result | ! Result | ||
! Image | ! Image | ||
| Line 73: | Line 73: | ||
| [[File:PG Debug Mode 1 L+R+Z.png|200px]] | | [[File:PG Debug Mode 1 L+R+Z.png|200px]] | ||
|} | |} | ||
| + | |||
| + | ==Full debug mode== | ||
| + | A full debug mode can be enabled by changing byte #7 (<code>0x00000007</code>; the disc ID version field) of the game's ISO. When set to value <code>0x99</code>, the debug mode is always enabled; when set to any value from <code>0x90</code> to <code>0x98</code>, the debug mode can be toggled by inserting and removing Controller 2. | ||
| + | |||
| + | Once activated, a green "D" appears in the top-right corner of the screen. | ||
| + | |||
| + | ===Features=== | ||
| + | *The following build information is displayed on the Nintendo boot screen: | ||
| + | <pre>SDK VERSION: 12Dec2001 Patch4 | ||
| + | |||
| + | |||
| + | <DISK ID> | ||
| + | GAMENAME: GAFE | ||
| + | COMPANY: 01 | ||
| + | VERSION: 0x99(153) | ||
| + | |||
| + | COPYDATE: 02/08/01 00:16:48</pre> | ||
| + | :*Additionally, meters showing CPU/memory usage appear on the boot screen. | ||
| + | *[[Mr. Resetti]] no longer appears when the game is [[reset]] or turned off without saving. | ||
| + | |||
| + | ====Debug controls==== | ||
| + | =====Controller 2===== | ||
| + | {| class="styled color-gameplay" | ||
| + | |- | ||
| + | ! Input | ||
| + | ! Result | ||
| + | |- | ||
| + | |} | ||
| + | |||
| + | =====Controller 3===== | ||
| + | {| class="styled color-gameplay" | ||
| + | |- | ||
| + | ! Input | ||
| + | ! Result | ||
| + | |- | ||
| + | |} | ||
| + | |||
| + | ==Debug menus== | ||
| + | There are several debug menus that do not require debug mode to be enabled, but can only be accessed through memory editing or Action Replay codes. | ||
| + | |||
| + | ===Forest Map Select=== | ||
| + | This menu allows the player to select from 52 maps, many of which are test maps: | ||
| + | {| class="styled color-gameplay" | ||
| + | |- | ||
| + | ! # | ||
| + | ! Map name (Japanese) | ||
| + | ! Map name (translated) | ||
| + | ! Description | ||
| + | ! Notes | ||
| + | |- | ||
| + | | align=center | 1 | ||
| + | | フィールト" コース1 | ||
| + | | Field Course 1 | ||
| + | | Test map | ||
| + | | | ||
| + | |} | ||
| + | |||
| + | ===Player select=== | ||
| + | When activated, pressing Start on the title screen displays a player select menu. Any of the four players living in town can be chosen. When chosen, the game immediately loads the selected player in the center of the [[player house]] acre; selecting a player that does not exist takes the player to the game's introduction on the [[train]] with [[Rover]]. The player can also choose to spawn in as a visitor from another town. | ||
| + | |||
| + | This menu is left untranslated from Japanese, and since {{PG|nolink}}'s font does not contain Japanese characters, the text appears corrupted. | ||
| + | |||
| + | ===Save type select=== | ||
| + | When activated, pressing Start on the title screen displays this menu. It is a leftover from {{DnM}} and was likely used to test writing saves to both a Controller Pak and Game Pak. | ||
| + | |||
| + | This menu is left untranslated from Japanese, and since {{PG|nolink}}'s font does not contain Japanese characters, the text appears corrupted. | ||
| + | |||
| + | ===NES ROM select=== | ||
Revision as of 18:07, November 6, 2023
Limited debug mode
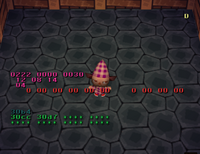
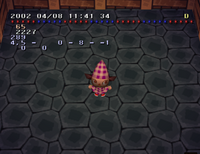
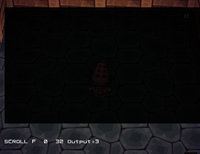
A limited, read-only debug mode can be toggled by inputting the following buttons on Controller 2:
- L+R, then Z
- ↑ on +Control Pad
- ↓ on C-Stick
- ↑ on C-Stick
- ↓ on +Control Pad
- ← on +Control Pad
- ← on C-Stick
- → on C-Stick
- → on +Control Pad
- A+B
- Start
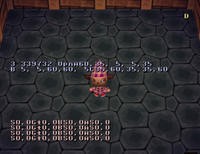
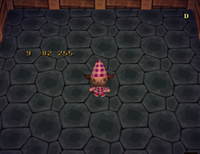
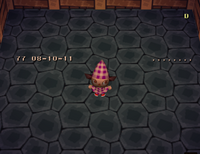
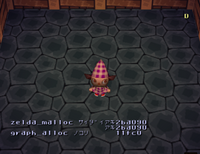
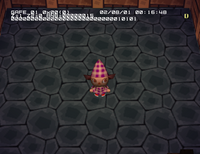
Once activated, a yellow "D" appears in the top-right corner of the screen. The debug mode persists even when the game is reset.
Features
- A translucent red arrow appears in front of the player and points to floating balloons and special visitors.
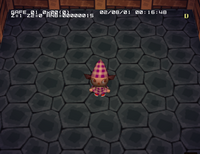
- The following build information is displayed on the title screen and during a K.K. Slider performance:
[CopyDate: 02/08/01 00:16:48 ]
[Date: 02-07-31 12:52:00]
[Creator:SRD@SRD036J]
Debug controls
All debug controls are done with Controller 2.
Full debug mode
A full debug mode can be enabled by changing byte #7 (0x00000007; the disc ID version field) of the game's ISO. When set to value 0x99, the debug mode is always enabled; when set to any value from 0x90 to 0x98, the debug mode can be toggled by inserting and removing Controller 2.
Once activated, a green "D" appears in the top-right corner of the screen.
Features
- The following build information is displayed on the Nintendo boot screen:
SDK VERSION: 12Dec2001 Patch4


<DISK ID>
GAMENAME: GAFE
 COMPANY: 01
 VERSION: 0x99(153)

COPYDATE: 02/08/01 00:16:48
- Additionally, meters showing CPU/memory usage appear on the boot screen.
- Mr. Resetti no longer appears when the game is reset or turned off without saving.
Debug controls
Controller 2
| Input | Result |
|---|
Controller 3
| Input | Result |
|---|
There are several debug menus that do not require debug mode to be enabled, but can only be accessed through memory editing or Action Replay codes.
Forest Map Select
This menu allows the player to select from 52 maps, many of which are test maps:
| # | Map name (Japanese) | Map name (translated) | Description | Notes |
|---|---|---|---|---|
| 1 | フィールト" コース1 | Field Course 1 | Test map |
Player select
When activated, pressing Start on the title screen displays a player select menu. Any of the four players living in town can be chosen. When chosen, the game immediately loads the selected player in the center of the player house acre; selecting a player that does not exist takes the player to the game's introduction on the train with Rover. The player can also choose to spawn in as a visitor from another town.
This menu is left untranslated from Japanese, and since Animal Crossing's font does not contain Japanese characters, the text appears corrupted.
Save type select
When activated, pressing Start on the title screen displays this menu. It is a leftover from Doubutsu no Mori and was likely used to test writing saves to both a Controller Pak and Game Pak.
This menu is left untranslated from Japanese, and since Animal Crossing's font does not contain Japanese characters, the text appears corrupted.
